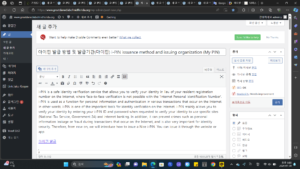
i-PIN is a safe identity verification service that allows you to verify your identity in lieu of your resident registration number on the Internet, where face-to-face verification is not possible with the ‘Internet Personal Identification Number’. i-PIN is used as a function for personal information and authentication in various transactions that occur on the Internet. In other words, i-PIN is one of the important tools for identity verification on the Internet. i-PIN mainly allows you to verify your identity by entering your i-PIN ID and password when requested to verify your identity to use specific sites (National Tax Service, Government 24) and internet banking. In addition, it can prevent crimes such as personal information leakage or fraud during transactions that occur on the Internet, and is also very important for identity security. Therefore, from now on, we will introduce how to issue a Nice i-PIN. You can issue it through the website or app.
index
1. Issuing an i-PIN using a PC
2. Issuing i-PIN via mobile
Issuing i-PIN via PC
1. Launch the NICE iPIN (http://www.niceipin.co.kr/index.ni) homepage.
2. Click the Get Issued tab.
3. Click the i-PIN/My-PIN new issuance tab.
4. Check the Agree to All button.
5. Click the OK button.
6. Click the General Member tab.
※ Of course, children under 14 years of age can also join. However, identity verification by the guardian (legal representative) is required.
7. Click the Non-face-to-face Authentication tab.
8. Select your preferred authentication method.
※ I will use a financial certificate in the PC version. When authenticating with a financial certificate or joint certificate, you must install a security program. If you would like to authenticate with a certificate, please follow the method below.
9. Click the OK button.
10. Click the Install button.
11. Save the installed program.
12. Check the Agree to All button.
13. Click the Authenticate button.
14. Select a certificate.
15. Enter the password for the certificate.
16. Enter your name and resident registration number.
17. Create the ID and password you want to use for i-PIN.
18. Enter your email.
19. Check the Agree to Issuance button.
20. Click the Issue button.
22. For additional authentication, select the additional authentication method you want.
※ I will use the secondary password.
23. Register a secondary password.
24. Click the OK button.
25. i-PIN issuance has been completed.
Issuing i-PIN via mobile
1. Run the Nice iPIN app.
2. Click the New Issuance tab.
3. Check the Agree button.
4. Click the Next button.
5. Check the Agree to All button.
6. Click the OK button.
7. Click the General Member tab.
※ Children under 14 years of age can also register as members. However, identity verification by the guardian (legal representative) is required.
8. Click the Non-face-to-face Authentication tab.
9. Select the desired authentication method.
※ In the mobile version, we will use your mobile phone to verify your identity.
10. Select your mobile phone carrier.
11. Check the Agree to All button.
12. Click the method you want to authenticate.
13. Enter your name, resident registration number, and mobile phone number.
14. Enter the security code.
15. Click the OK button.
16. Enter the 6-digit authentication number sent via text message.
17. Click the Verify Authentication button.
18. Create the email and password you want to use for i-PIN.
19. Click the Issuance button to complete i-PIN issuance.